
If you’re here to understand how to test flex PCB with a multimeter, welcome, and you’re in the right place.
Surprisingly, circuit board testing is an important part of manufacturing that every flex circuit design should never ignore.
It guarantees that your PCB is error-free and works according to expectations.
One important and easiest testing tool we have is the multimeter.
This tool measures multiple electrical properties, including voltage, current, and resistance.
Most designers use it to test for circuit board continuity and identify broken connections.
But do you know how to use it?
This article gives you critical information on how to test the flex circuit board with a multimeter. Let’s get rolling.
Table of Contents
- What Is A Multimeter and How Does It Work?
- Quantities A Multimeter Can Measure
- Benefits of Using A Multimeter for Testing PCBs
- Guide To Testing Flex PCB with Multimeter
- FAQ
- Conclusion
What Is A Multimeter and How Does It Work?

(A photo of a multimeter)
A multimeter is a portable equipment for electrical properties like the voltage, current, and resistance.
Also, people call it a digital multimeter, volt-ohm meter, or multitester.
Surprisingly, you can use it to troubleshoot and test electrical properties when manufacturing or repairing electronics.
Below are the main multimeter symbols to look out for.
- First, the direct current (DCV) feature represents an electrical voltage that remains constant over time, and we measure it in volts.
- The second alternating current voltage (ACV), unlike the DCV, this voltage alternates periodically, and we also measure it in volts.
- Thirdly, resistance (Ω) represents how much energy an electronic equipment loses when current flows through, and we measure it in ohms.
- Moreover, the continuity symbol measures how effective a connection is between two points.
- Furthermore, the direct current Amperage (DCA) represents the current flowing through a circuit, and we measure it in Amperes (A).
- Finally, the direct current gain (hFE) represents how much a device amplifies the input signal.
Quantities A Multimeter Can Measure

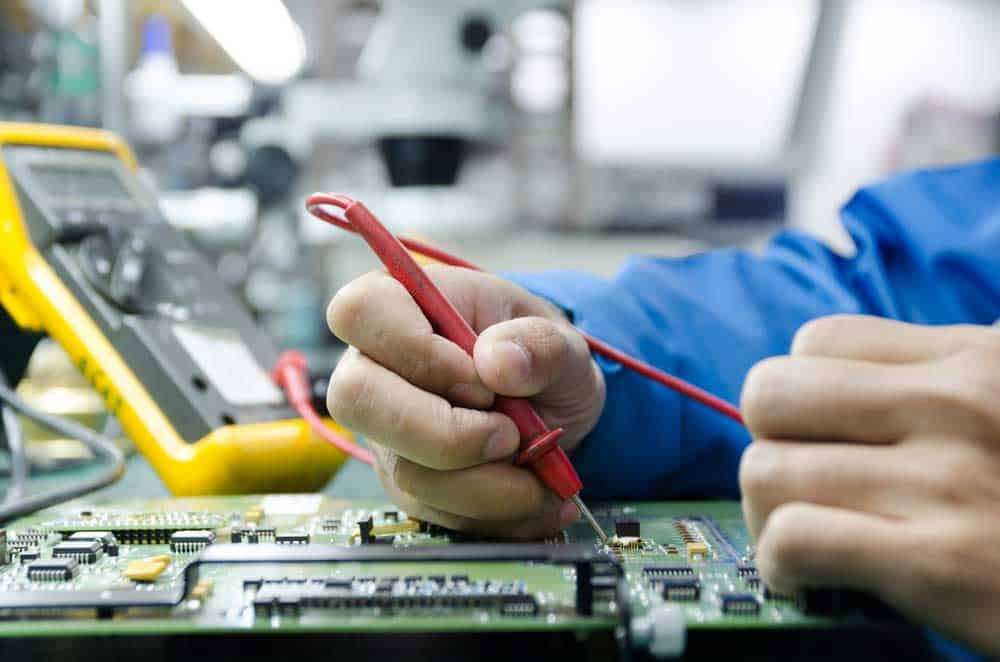
(A technician measuring using a multimeter)
The main quantities you can measure with a multimeter include voltage, resistance, current, and continuity. Let’s check them out below:
Measuring The Voltage
This measures the potential difference between two flex circuit board ends.
The first step is to the multimeter voltage position.
Afterward, connect the multimeter red probe to the end you want to measure and the black probe to the ground.
You can then read the voltage reading that appears on the screen.
However, there is a multimeter maximum reading that, when exceeded, can damage the PCB.
Measuring Current
Current measurement involves determining charge flow through your flex board.
Like voltage measurement, you set the multimeter to the current position.
Surprisingly, most multimeters have a current range of 10A.
You can then connect the probes with the red and black probes, going to the positive and negative sides.
Therefore, what appears on the multimeter display represents the current through the particular component.
Measuring Resistance
Resistance is the measure of the obstruction to the flow of charge.
You set the multimeter to the resistance position, like the current and voltage above.
Place the probes to the ends of the component you wish to measure the resistance.
The value you’ll read on the multimeter display is resistance.
Measuring Continuity
Continuity test helps you determine whether two points in a circuit are well connected.
Therefore, it becomes easy to identify broken wires, damaged parts, and open connectors.
First, set the multimeter to the continuity position.
You can then apply the probes to the ends of the points you wish to test.
The connection between the two points is solid if you hear a beep sound.
However, it’s important to note that most multimeters only measure continuity of up to 400Ω.
Anything above this might record no connection or open circuit.
Benefits of Using A Multimeter for Testing PCBs
(Engineer taking measurements)
There are many reasons why you should count on a multimeter for flexible circuit board testing:
- High impedance input: Multimeters are designed with the highest input impedance of any other PCB testing tool.
- High-frequency range: Additionally, you can use your multimeter to measure frequencies up to 700MHz. Therefore, they’re perfect for high-frequency testing.
- Accuracy: We guarantee that you’ll find it difficult to find a tool with the accuracy of a multimeter. It can offer an accuracy of up to thousandths, offering the best calibration solutions.
- Auto output display: They’re designed with a feature to offer an automatic output range for the current, voltage, and resistance.
- Security and safety: Designers create with safety features in mind. Surprisingly, the device is designed to be free from shock.
- Auto polarity feature: A feature reverses the reading polarity immediately after you switch the probes.
- Robustness: No matter how frequently you use your multimeter, expect it to offer great performance without getting damaged easily. Therefore, you can use it in educational, industrial, and business settings.
- Versatility: Most multimeter tests almost all electrical properties, including continuity, temperature, and voltage. Surprisingly, they support multiple uses like calibration and troubleshooting.
- Portability: A multimeter is small and light enough to carry and test a circuit board from wherever you see fit.
- Cost-effective: Finally, multimeters aren’t only affordable and perform multiple tasks. Therefore, you won’t have to buy a voltmeter and an ammeter separately.
Guide To Testing Flex PCB with Multimeter
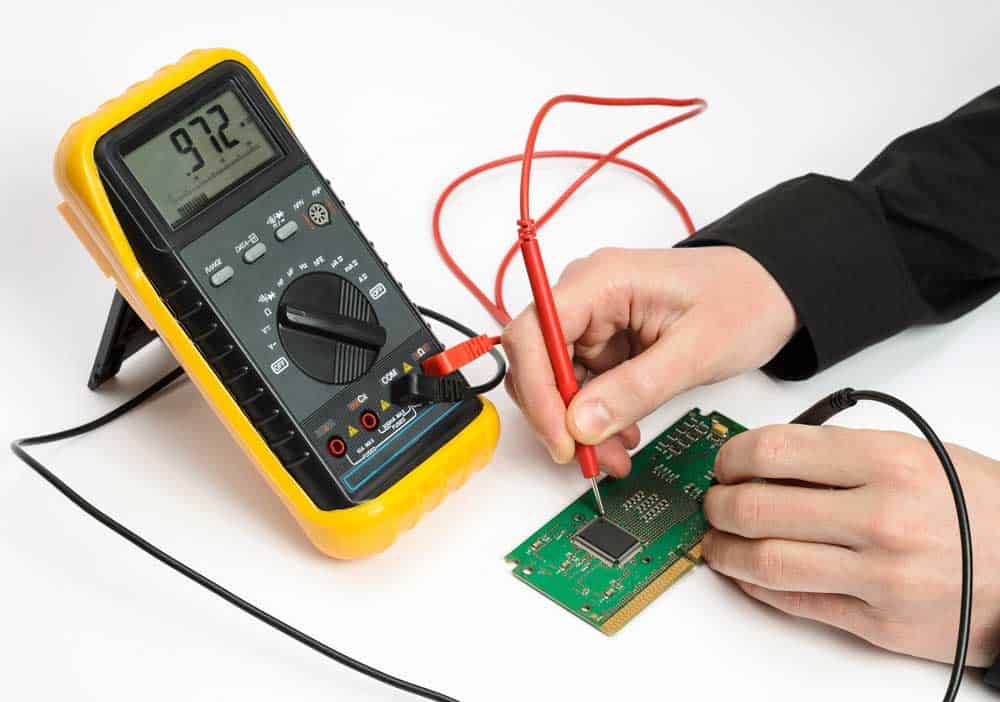
(Testing PCB components)
Testing a flex PCB with a multimeter can be straightforward if you understand what you’re doing.
Check out the steps below:
- Start by checking the multimeter probes and polarity. Generally, every multimeter has black and red probes representing a negative and positive polarity. Therefore, plug the probes into the multimeter in readiness for testing.
- This is the most important step and involves choosing the function you wish to test on your board. You can usually measure voltage, resistance, current, or continuity. If you wish to test power or voltage, choose DC or AC or turn the knob.
- Next, unplug the electrical device to understand whether the parts work effectively. After that, please switch it on and ensure you don’t touch the wiring.
- This is the time to check for resistance and voltage. Also, you should do a basic test by touching the probes to the test point. For the resistors, measure the resistance by connecting the probes to the end of each end. However, the voltage and current testing require you to adhere to the device’s polarity.
- The main function of a multimeter is to check for the board’s working functionality. Therefore, repeat the above processes for all components on the board. Ensure you proceed systematically to single out problematic components.
FAQ
Is a multimeter accurate in testing flex PCBs?
Yes, few circuit board testing equipment can compare to the accuracy of a multimeter.
Surprisingly, it can offer an accuracy of up to thousandths.
Consequently, most engineers prefer using it for making calibrations.
What alternatives can you use instead of a multimeter to test PCBs?
There are several reliable alternatives to a multimeter in different use cases.
Check them out below:
Safety Tip When Handling a Multimeter
Safety is important for the proper functionality of the multimeter and for safeguarding a user’s life.
Therefore, it’s important to take the necessary safety measures starting with disconnecting the power before measuring anything.
It’s in your best interest to always assume the circuit board is always live.
Moreover, we recommend using insulated equipment and wearing protective gear.
Lastly, take note of any safety precautions on your multimeter or circuit board.
Conclusion
Nowadays, circuit board testing is important since minor damage to one component can render the whole product useless.
And few tools can compete with a multimeter regarding flexible circuit board testing.
Surprisingly, a multimeter measures countless electrical properties like voltage, continuity, current, and resistance.
Also, you can employ a multimeter for several purposes, like calibration, troubleshooting, and maintenance.
However, the most important thing is understanding how to use a multimeter, and we’re confident the above guide will help you.